Friday 31 January 2014

Shoe box transformed...

So we needed to take a wooden box for this challenge with Creative Jump start 2014 but I didn't have one... I had a shoe box!! I taped the wholes closed. I then applied gesso to the box... The gesso said " I don't like the tape!!" It flaked off and didn't bind! I needed to find an alternative to cover the tape  so that the gesso could be applied... I did a layer of PGA glue... No go, with the gesso... So know the box had gesso on as a base I then painted it with midnight blue... Super stoked with the colour!!! So I hung back and enjoyed it for a few days before moving on to the next step....


 Then I tried Matt medium...still no go with the gesso!! At this point I was ready to dump my idea and just buy a box and start over but then I mixed the PVA & gesso together and applied it in the hope this would hold!!! When I woke up the following morning I was all to grateful to find that it worked!!
 
So know the box had gesso on as a base I then painted it with midnight blue... Super stoked with the colour!!! So I hung back and enjoyed it for a few days before moving on to the next step....
 
Know once all dry you take your candle and rub over your box well. This will create a resist for the next coat of paint. I then chose a yellow oxide to paint over the midnight blue. Once dry you will sand gentle to get your desired effect. Once sanding has been completed apply a coat of clear vanish. Two coats would be better than one but let the first dry before applying the second. Using your distress crackling apply two coats, then let it dry. Get a soft cloth and with brasso metal polish you apply a thin layer of the brasso on the box. The brasso will sit in the cracks. It doesn't take long to dry and it will have a white residue which needs to be rubbed off but will leave behind what needs to be in the cracks. I then used to different ribbons to embellish the main ribbon I put around the whole box the top ribbon I only added in front. I then used brads to add a bit of bling. My clock face I embossed and then I used perfect pearls to add colour  and placed a pearl in the centre of the face. On the left hand side I place a metal flower with gears over it and a key. I sprayed it plum purple and black tea to enhance it. On the top of the box it kitchen foil embossed in my cuttlebug with my butterfly spellbinders and I added a white butterfly.


Here you can see the 3 different boxes I have made for sprays, inks and my stamps...Love my boxes! These boxes are always a new challenge. Doing the crackle was different and I most certainly will do this again. Keep watching busy with my next one...
 
Happy box making
XXOO 

Thursday 30 January 2014

Sunflowers

Heaps going on...Loads of inspiration and lots of journaling!! So this journal was whilst we had a rainy day and I decided to bring a bit a sun into the home. I have a love for sunflowers much thanks to Catherine Matthews-Scanlon who did a drawing which was amazing and showed me a new side to an already stunning flower!!!


Started off by placing 2 random colours on the page - blue and yellow (see product list below)
once dried I used stripes of paper to edge the page. Then using my serviettes I cut them out and place them where I wanted them to make my picture. I modge podged it down and then used matt medium over the page. First I wet the page before starting with the gelatos then I added the colours I wanted to add depth to the page. Then I dried the page and reapplied matt medium and let it dry.
I then took my stencils and with my white paint I added extra texture to my page. Then mixed teal paint with  textured medium. once dry again I added matt medium again. Then I wrote a phrase that for me
will make a statement in my life!


Enjoyed bring sunshine in to my home!!
Hope you enjoy the page...
XXOO

Products used:
Martha Stewards Satin paints: Meadowlark
                                                  Aquirium
Gelatos: Blue
              Yellow
              White (for blending)


Tuesday 21 January 2014

Betrayal

 
 This journal was inspired by France Papillion...Love her work!!
I started with Tim Holtz Distress Broken china and rubbed the full pages. I then dried the page completely. I took my stencil and with versamark I inked the pages. I took clear embossing powder and covered the page, hence the reason we need the page to be completely dry or the embossing powder will stick on the paper that is still wet! Heat the page with your heating tool.


You then need two(2) different distress inks to blend around the edges of the page. I used fire brick red and fryed buryb from the rangers inks. I then used vintage photo on the edges of the page to enhance my page. I then measured my page and divided it in 3 to make sure that my gaps are even. I then used blue twine and glued it down. I took two pieces  tissue paper, stamped images on them and sprayed them in two different tones of blue and then I also sprayed red pepper on the enhance the fire brick ink on the page. Once the tissue paper is dry I folded it to the way I wanted it. I  then stapled it to the page.
 
I took corrugated cardboard and put gesso on it an tore it down to the sizes I wanted for may pages. I edged in gold ink. I stamped butterflies and then added my chosen phrase, ribbon & embellishment.
Each page I do in this small journal is a journey for me. I have to learn to let go of hurt & betrayal and through my art. I'm hoping with each step I can heal a wound. Grown stronger and become a better person. Thank you for taking this step with me.

Happy journaling
XXOO

Sunday 19 January 2014

Band of brothers

This is a technique I saw and was keen to give it a go but hadn't had the "glue" for it so after having a discussion with Kim (my friend) she mention I could use her spray adhesive  to give it a go!!
Yes... You will need spray adhesive (any will do) for this technique. I took a stencil and placed it on my paper and then sprayed the adhesive. I lifted the stencil directly after spraying and washed it in hot water as to not leave any glue residue on the stencil. Once dry ( about 30minutes as per the instructions on the spray can) I then used Dylusions Campso teal and sprayed both pages.... The glue then resists the spray leaving the image of my stencil.... Most certainly will do this one again!!!


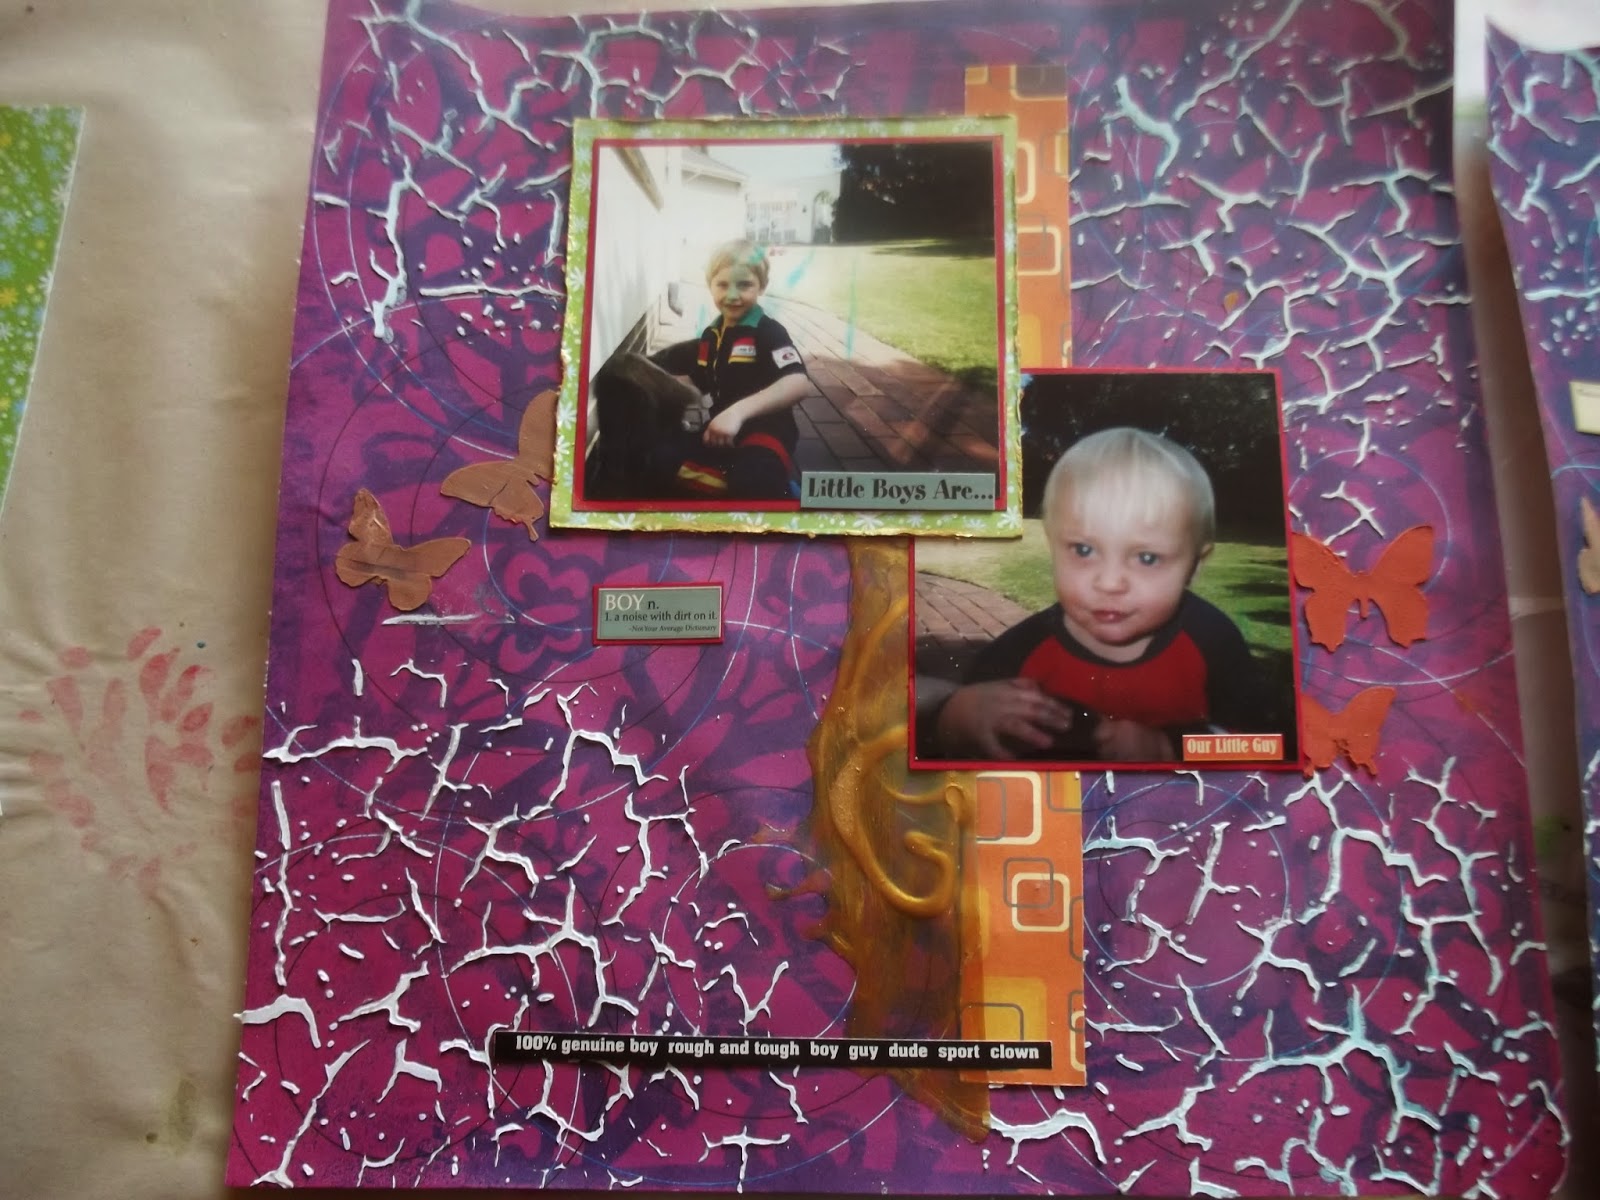
Once the pages where dry, I took the crackle stencil and did the impressions I wanted on the corners with modelling paste to give it texture and build depth on my page! When the modelling paste started to dry I noticed some of the modelling paste absorbed the Campso teal and some of the modelling paste stayed white... so random but so effective!! I then added two butterflies on each side of the page with different pre-mixed modelling paste. All my pictures are backed in red card stock. The two centre images are backed in DCWV premium glitter stack, distressed and have galaxy gold ink edging. I then used Kaiser raft - shaken not stirred collection to back the images. I have also made "gold skin" ... Yes... you read correctly "Gold Skin' - Thanks Julie Fei-Fan Balzer!!
it is very easy but you have to be patience! this is how you do it - you need  a good acrylic paint in liquid form and then you draw you images. once it has dried for at least 2days minimum. then you take modge podge and apply a then layer over the top of the acrylic images that you have drawn. Once it has dried ( 2days minimum) you can then lift it and cut to what ever size you want for your page! In this page you can see I applied the modge podge too soon over the acrylic and the gold blended with the modge podge hence the modge podge is not clear but has got tones of gold in it...


I used modge podge to stick  all my stickers down so that I didn't have them lift. I do love the images of the boys playing with out cat back in South Africa...They boys do just grow up so fast!
thankfully they do still help heaps in the garden or I would never cope with the garden I have know!!
Loving my boys and loving my new home!!!
XXOO

Friday 3 January 2014

New Year... new Inspiration

December 2012 I found our about creative jump start 2013! Creative jump start introduced me to so many new technique's that I went into creative overload!!! I just wanted to buy every new product and try every new technique I was so in love with what I was learning from all the  new artist I was discovering on the workshop. I eventually slowed down and began to perfect a hand full of what had been shown and started to follow the blogs of the artists on the workshop and from this magnificent program I keep getting inspiration from the talented artists that will be appearing again in this workshop over January 2014!
Looking for inspiration come and join me at Creative Jumpstart 2014

http://www.nathaliesstudio.com/cjs/creative-jumpstart-2014/


Happy New Year to you all and may the year ahead be filled with all the creative inspiration you require!!!
Joan
XXOO