Monday 16 June 2014

All Boy


Great page heaps of work....

I started with my Stanley knife and mat, 3.5hours later I had cut out every square and rectangle
to create the edges on this layout.
With my circle punch I punched out 3 circles for each page in different colour papers to
blend with the tones of the pages.
I did the same with my star punch. 3 stars per page.
Remember to use your Distress ink - Vintage photo
to ink the edges of both the stars and the circles.

Choose your two main photos - one being landscape the other being portrait.
I then using an oval stencil and cut out my second photo as an oval and backed it in green and again edged it with my distress ink - Vintage photo
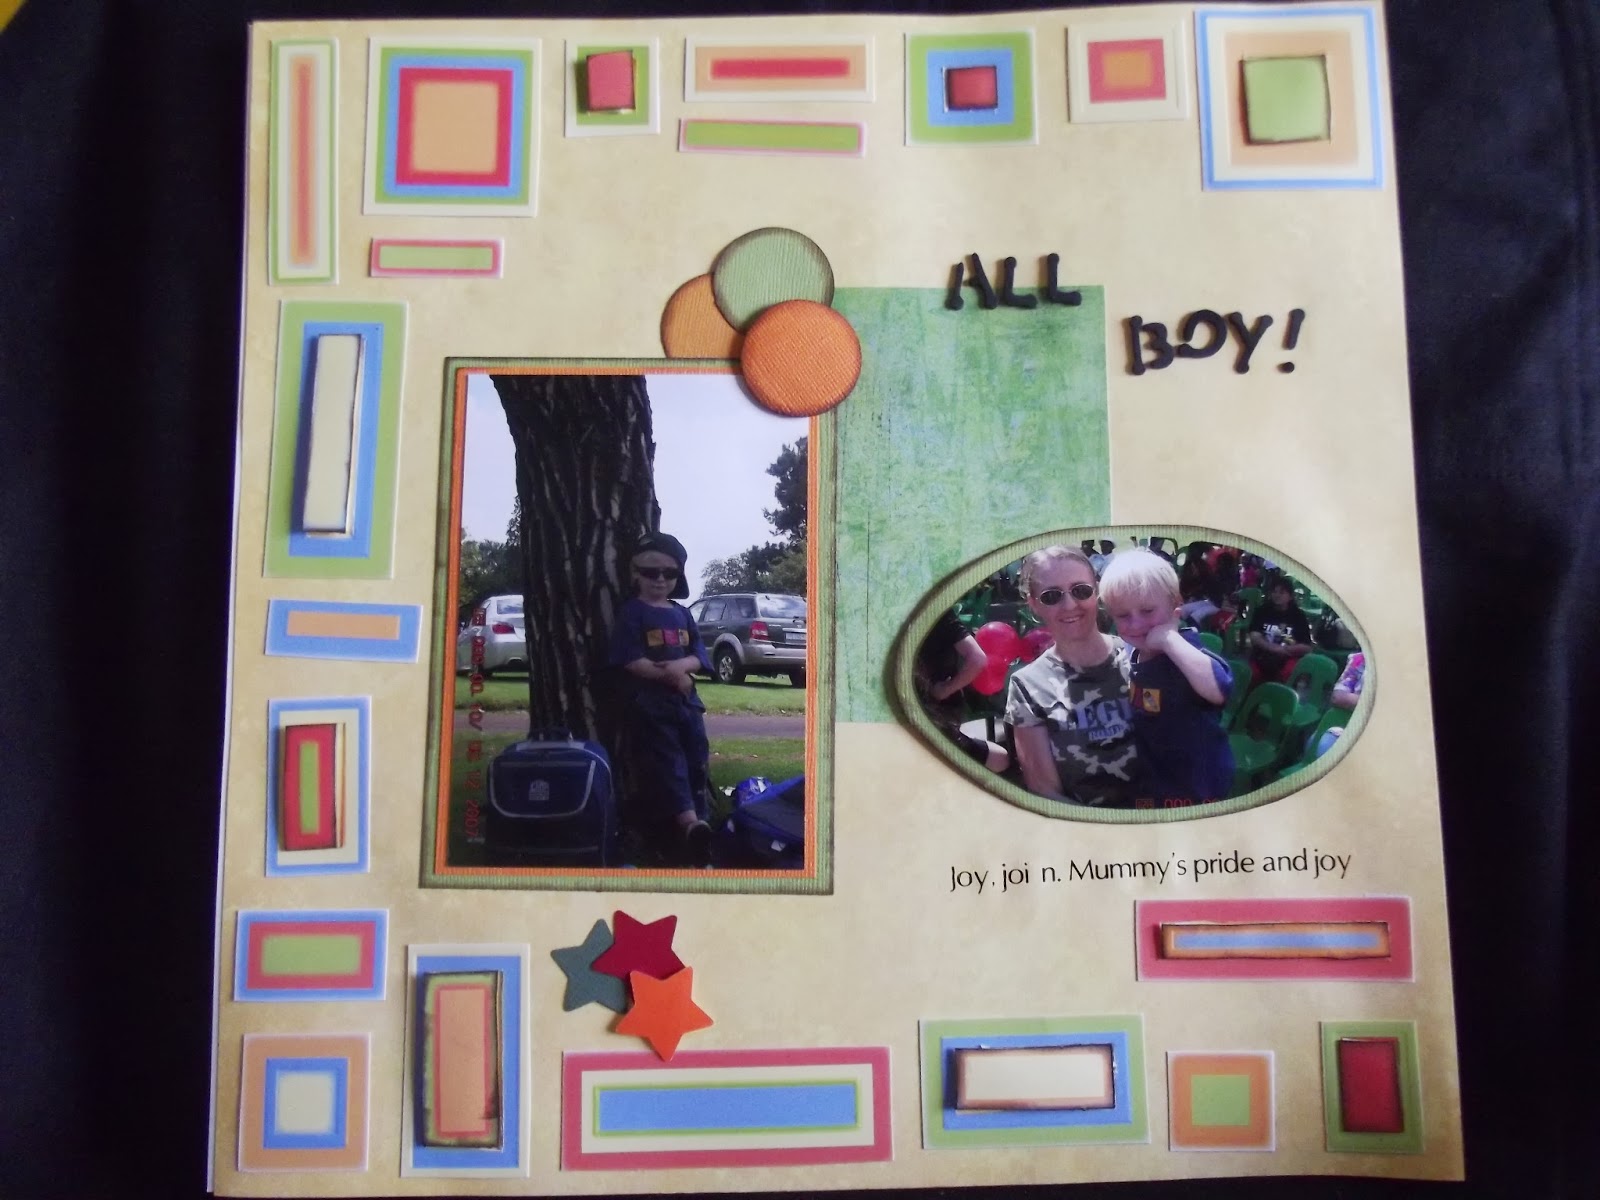
Joy. joi n. Mummy's  pride and joy

My third photo is cut out in a circle and backed in Orange paper and again inked with distress ink - vintage photo.
Like photo's one and two they are backed and edged in the same manners as above. A green piece of paper  which is square (8cm x 8cm) is placed in the centre of both pages.
I then started the work methodically in placing the pieces of cut squares and rectangles around the edges of the pages. to give it dimension I used foam tape to lift some of the squares and rectangles of the page. the foam tape was used in the same way with the stars and the circles to give it lift.

Handsome, hand' sum Attractive
Handsome

I added a small pocket with a tag so i could journal about my day with my little man Ethan and the rest of the family... but Ethan in my arms is always a pleasure I enjoy! Hes outgrown that.. but the cuddles they will last forever!
I found some rub-on's that will go with this page so I added them and then added the title..."All boy!"

Love how the colours pop...
Hope you enjoy this page as much as I enjoyed creating it!


Love to you all

Sunday 15 June 2014

Autumn

Challenge time...

So we had Autumn colours with a related image for this challenge. I chose only to use the autumn colours and did my journal. I started with torn strips of and old pattern and modge podge it to my page. I then chose my browns and started with my lightest brown then brought in my burnt umber. I the. Dried with my heating tool. I then used serviettes with leafs on and tore them to how I wanted.


 I modge podge my serviettes on in random places. I made sure that when I modge podge I put it over the whole page as it was my final layer. I then tool my vintage photo - distress ink and inked over the whole page to lift the colour. I used distress ink - walnut stain on the edge of my pages.
I instinctively pick up my black Pitt pen and write my saying on my pages.... But then realise it is blending in with my page!!! I go back over the black with my white paint pen to enhance the saying and add stitching to the edging of the page.


Have a great week and enjoy what ever the weather my bring you:)

Happy journaling :)

Sunday 8 June 2014

My yellow brick road


I wanted to try a different background, so I took ring reinforcements and placed them randomly on my pages. I then took my squeezed orange and dirty martini - Dylusion sprays, and sprayed my pages. I did love how the ring-reinforcements repelled the sprays and stayed white. I then dried with my heating tool.
 
Once dried I drew in the foot path and with modelling paste filled in my path to give it dimension. I then painted the  path with Martha Stewards - Meadowlark. I then drew in my black lines with my Pitt pen. I used a red archival ink and a rose stamp and stamped around the path.
 
 
I cut legs out of the magazine and then painted over them to get the effect I wanted. Teal is used for the skirt colour and then I used red glitter embossing for the shoes. For the phrase I found words on a card but wanted to change what was already on the cards so I gessod over the words and when it was dry I wrote in what I wanted to say...
"Whatever your yellow brick road may be, don't be afraid to take the first step!'


I do love this saying.... it most certainly gives one strength to take the step in ones life to move forward and not look back!!

Go forth and take your first step....

love and kisses
xxxoo

Travis' 2nd Birthday


Loved doing this page!!!


So to start you need a large piece of tissue paper and as many of your favourite stamps... if you love them all then go for it use them all!! I used a mixture of both stamps and after I had stamped I chose 3 different stencils and added them as well.

Take your stamps and your staz-on ink and randomly stamp over the tissue, leaving as few, if any gaps as possible. if you over lap that's okay as well. Then using your modge podge stick the tissue paper down on to the pages. Then dry with your heating tool. Once it's dry chose your colour sprays you want to add to your page and spray randomly.


Dylusions: Bubblegum Pink ; Dirty Martini; Campso Teal; Squeezed Orange
 
I then took some stencils and added more images on the background with my staz-on ink....BUT
BEWARE: You must bleach your stencils directly are use with staz-on inks.
I then backed my photo's with black and white paper and edged with distress inks - vintage photo.
I then took mesh tape and cut pieces and placed in various spots and then took my versamark and rubbed over the mesh and put embossing powder over and heated. you can either heat until the embossing powder melts and leave or you can heat past the melting of the embossing powder so that the meshing tape begins to melt adding a different effect.
I then painted Travis' name with a stencil... not my best work!
I lastly added the sticker flowers to keep with the black and white photo's
i found velum phrases and words for parties so I added that to finish of my party page.
I do love how the page came together in the end.


Cheers all happy journaling
XXOO

Don't react in the same ways....


Yes it has been awhile, but I have done heaps of crafting.... So today I have got bloggers fingers on so here goes!!


I did spoil myself with a new set of water paints and wanted to try them so with my background I took my round stencil I and gessoed over the whole page. Once that was dry I used the water colours to do random colours of various sizes over the gesso and my background. 


I do love the vibrant colours of the waters colours!!

I took a serviette and use my mod podge and placed it over the whole page. Once I dried my page I added my phrase... Simple yet so effective... Love it!!

Love to you all
XXOO